
With the Monday holiday we had another shortened week. Still, students continued to work on their projects. Our Sophomores continued with their coding guides as they prepare for their upcoming LED Lightbox project. Next week we will put together our 3D printed Steam Engines.
This week’s Student Spotlight is Junior Ibrahim Ahmad.
Ibrahim’s latest blog post:
Updating the Rear Shock Stand and Tool Pouch Mount
Intro
In my last post, I shared a display stand I designed for an old rear shock and a mount for a bike tool pouch. This week I worked on both designs again.
The shock stand was too tall because the model I used had more travel than my shock. I also adjusted the tool pouch mount and added slots for Velcro straps.
Both projects needed small changes instead of completely new designs. I wanted to keep the parts that already worked, fix the measurements that were off, and get the models ready for another round of printing and testing.
Updating and Testing the Shock Stand
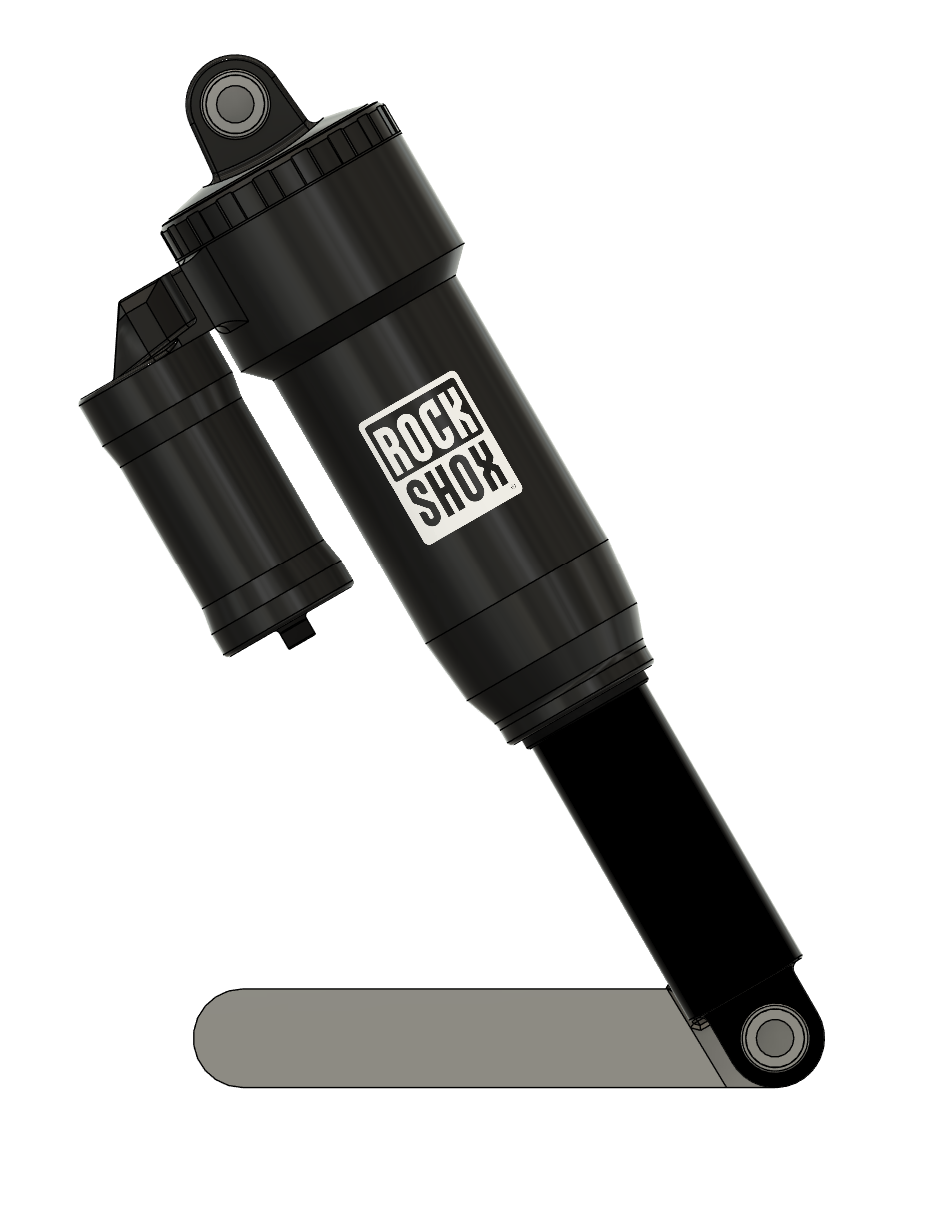
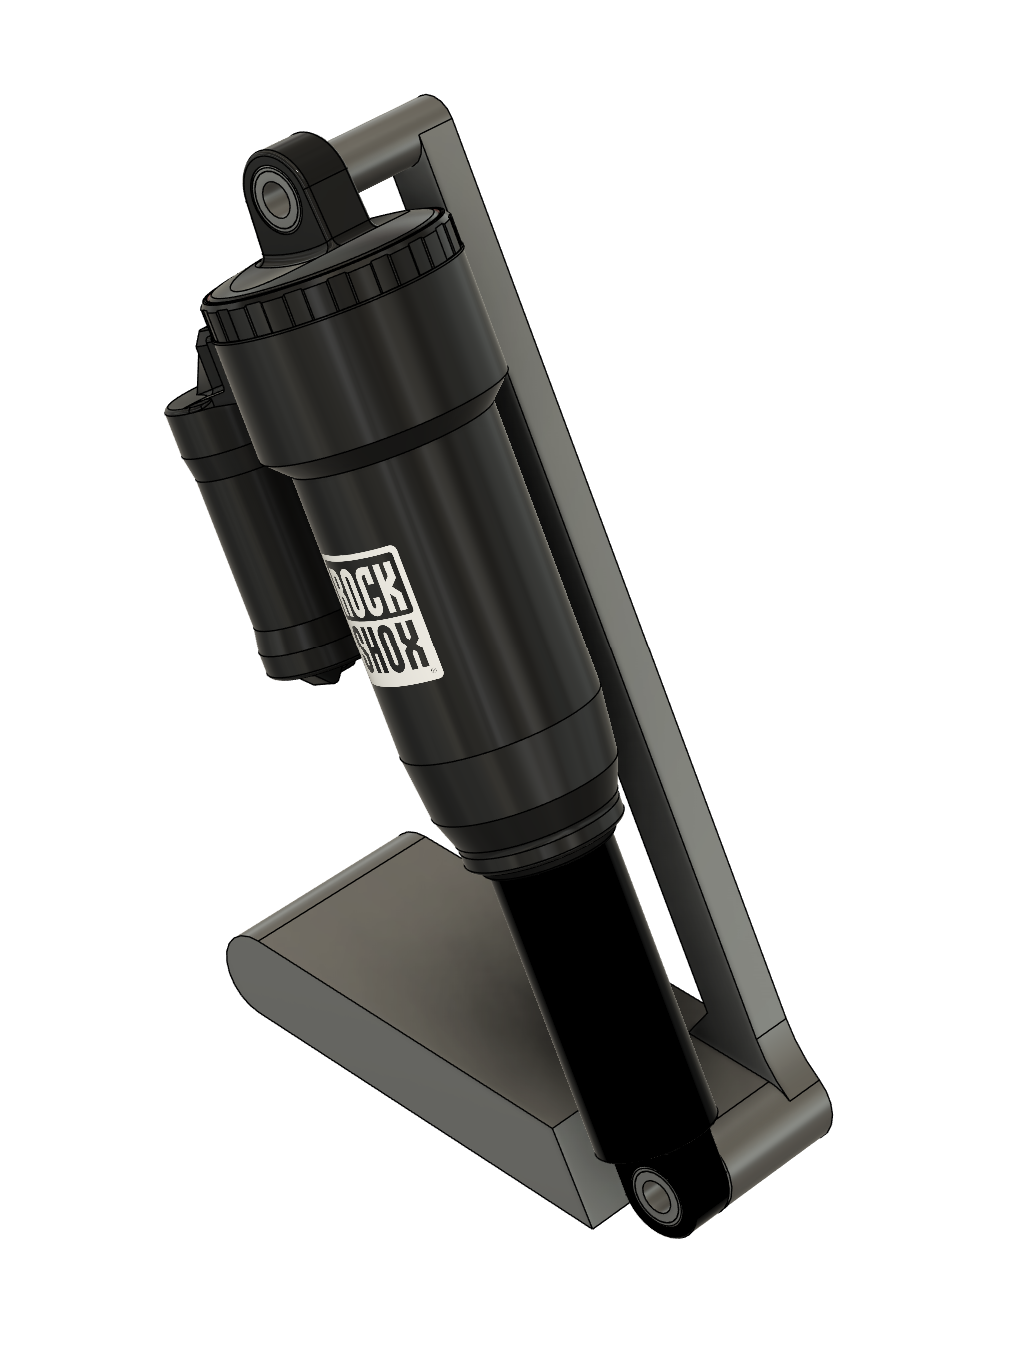
CAD renderings of the updated rear shock display stand.
I originally designed the stand around a RockShox CAD model I found online. RockShox makes several shocks with different amounts of travel, and that model was longer than the shock I actually have. I went back into the CAD model and adjusted the stand around the dimensions of my shock instead.
I made about three or four different versions of the stand while deciding how I wanted to build it. Some of the versions were designed so I could mill them, but they made the project more complicated than it needed to be. In the end, I realized that 3D printing was the best option because I could make the full shape as one part and test it quickly.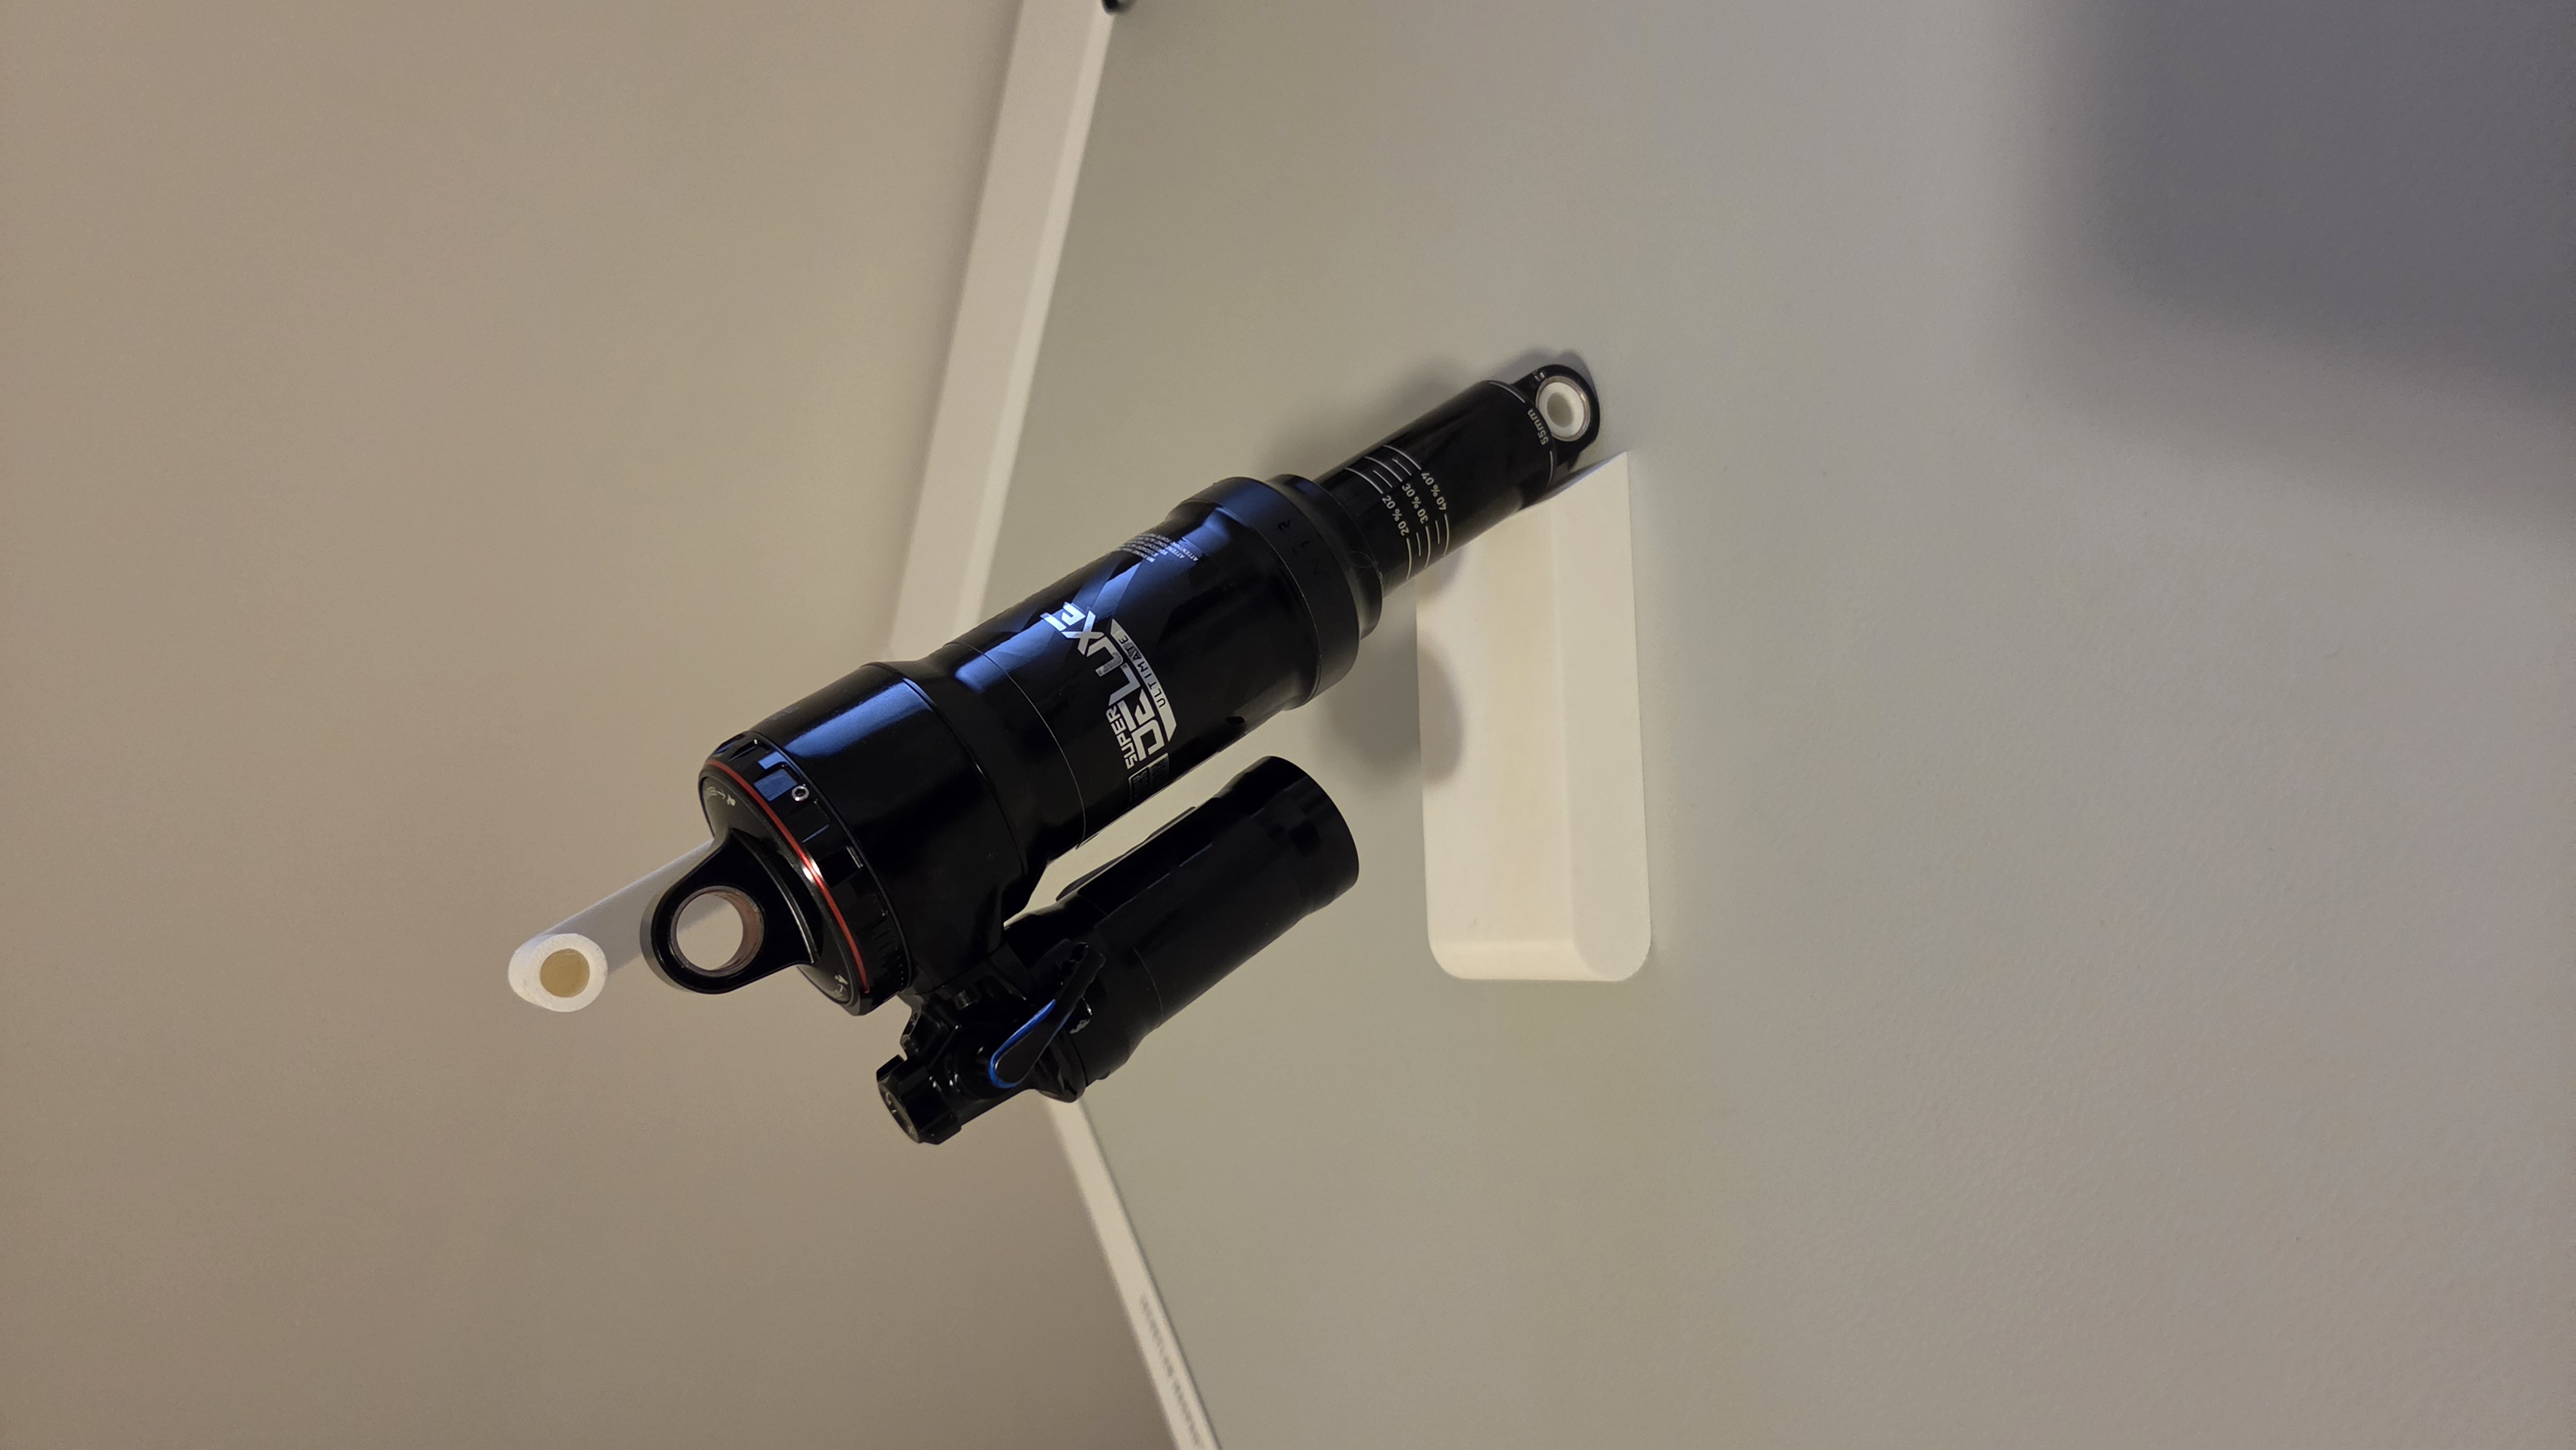
The printed stand is too tall for the rear shock.
Once I 3D printed the stand, I realized that the parts did not fit together. The top hole on the stand sits above the mounting hole on my shock. The shock still balances well on the base, so I realized I do not need the upper arm. I can either cut it off the current print or remove it from the CAD model and reprint the stand. After that, I need to test the balance again and make sure the shock still sits securely.
Updating the Tool Pouch Mount
I also went back to the bike tool pouch mount from last week. I changed some of the dimensions so it should fit the bike tube better and added slots for Velcro straps. The straps will hold the mount in place while still making it easy to remove.
So far, I have only printed a few small test versions instead of the complete mount. I have not had a chance to test those pieces on the bike yet. I adjusted the curve based on the bike tube dimensions, but I still need to check the real fit.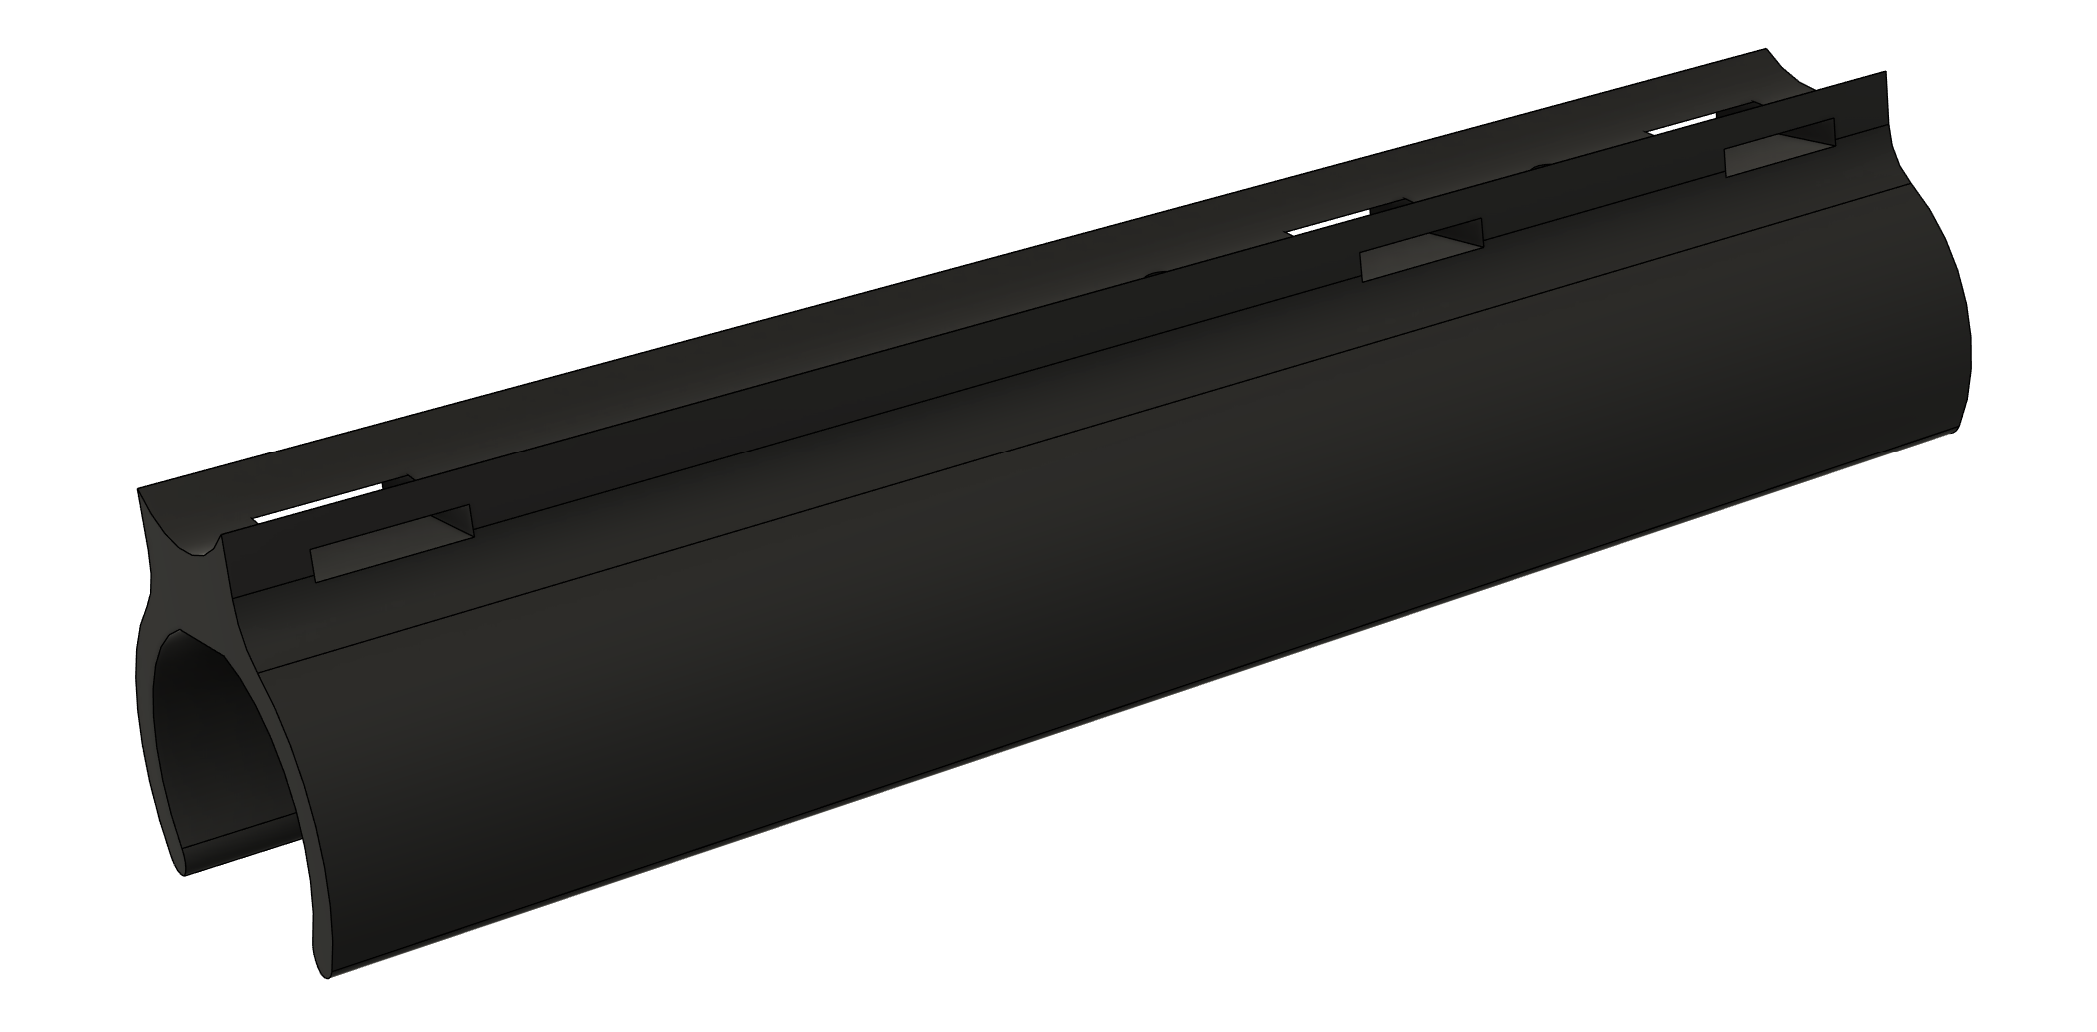
Full CAD rendering of the updated tool pouch mount and Velcro slots.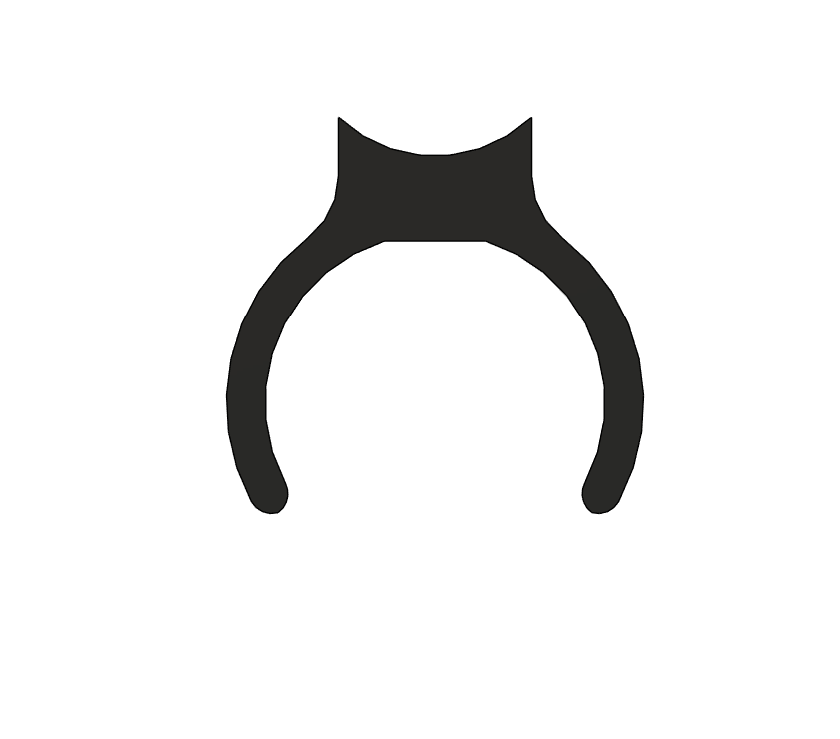
Cross-section showing the updated curve around the bike tube.
The first rendering shows the full length of the mount and the Velcro slots spaced across the top. The second rendering shows the cross-section and the updated curve that sits against the bike tube. I kept the mount open so it can wrap around the tube instead of needing to slide on from one end.
The Velcro straps will pass through the slots and wrap around the tube. This should make the mount easier to move between bikes because I will not need permanent hardware on each one. I can loosen the straps, remove the mount, and attach it to another bike when I need it.
Next I need to test the small pieces on the bike, make any final changes, and print the complete mount. After that, I need to make sure the Velcro straps hold it securely while riding.
Conclusion
I need to revise the shock stand slightly, but it works in theory. I also need to reprint the tool pouch mount, test it on the bike, and make any final changes.
I also want to take the Autodesk Fusion mechanical certification, so I am going to spend more time in the machine shop. I want to learn how to use Fusion’s manufacturing tools and better understand what is happening during the machining process before I take the test. I am going to work on a small ring project, which will hopefully help me learn how to use the lathe and practice some of these skills.

