This week we were visited by a US Navy Nuclear Machinist Mate, or Navy Nuke. The Navy uses nuclear energy to power aircraft carriers and submarines. Nukes undergo a rigorous engineering training in order to gain the knowledge to maintain these systems. Machinist Mate Carter Outsa gave our students a presentation on nuclear energy and then talked about his experience working with nuclear power systems in the Navy. It was a great learning experience, and Carter mentioned to me afterwards that this was the most engaged group he’d presented to – so thank you to our students for being such great listeners!
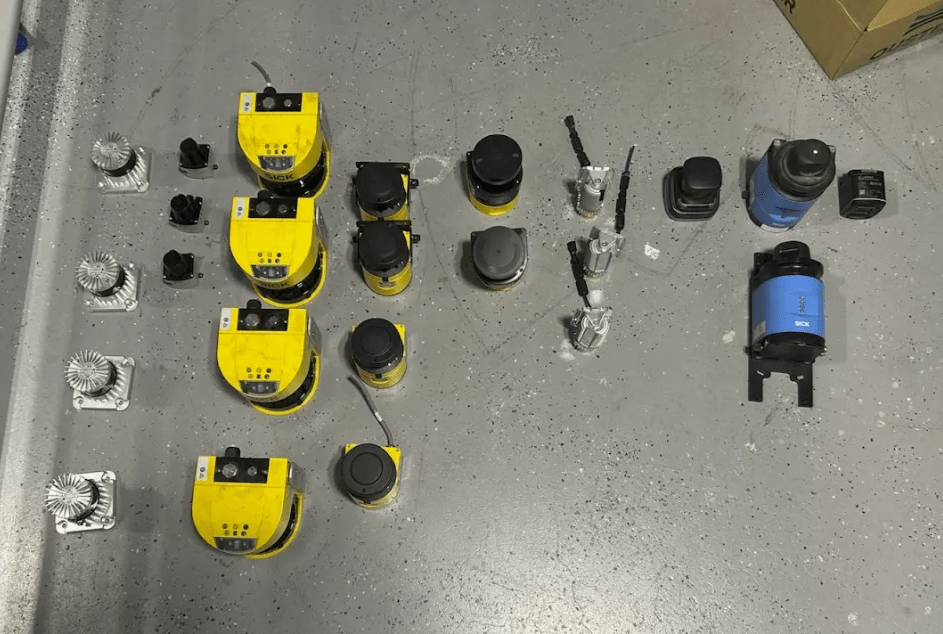
Additionally, this week our shop unloaded roughly $180,000 worth of new equipment donated from Vecna Robotics. Much of the equipment is LIDAR sensors, which can be used for autonomous vehicle driving. We are excited to have all this new equipment, and grateful for our partners like Vecna who continually support our program!
Now on to this weeks work.
Senior Gabe Araujo continues his work on the Micro Mouse:
This week I started to make a new design for the PCB so that I could add the comparator. In the process, because the PCB did not have much space to add a new component, I decided to add a new layer so that some of the components could be put on top of the others.
For this PCB I had to make two different schematics because I made the two different PCB to accommodate all the different components, On one schematic I put the sensor, the potentiometer, and the comparator. On the other schematic I put the micro controller, the motor controller, LEDs, and the connection for the motor, and battery.
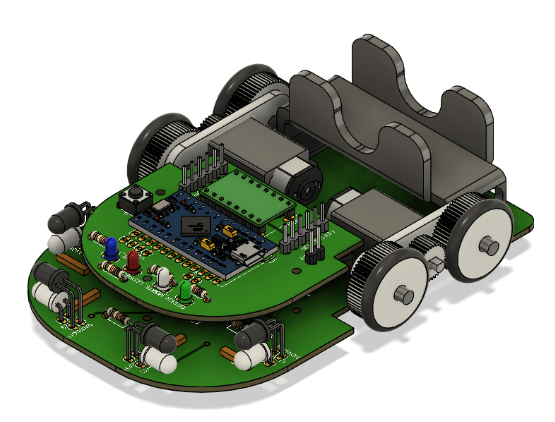
I was able to route all of the components, with some that will have to have a jump for the pins, The components are all at the front of the PCB with the space on the back for the motors and battery. I added three holes that will be used for the mounts so the PCB’s can be stacked.
This is how the micromouse will mostly look like with all the components in the front with the motors in the middle, and the battery in the back. Since I added a new layer to the PCB the battery could have it own space in the back, and since I have not cut the PCB to test, I am hoping that because in the other PCB the battery was at the front, it made the micromuse heavier at the part so the micromouse was tilting to the front, and now with this one the weight of the micromouse is more distributed. I have yet to cut the PCB, so that will be left for next weeks work of cutting, soldering, and testing.
See more of Gabe’s work on his website, linked here.
Junior Echo Valdez-Melgar was working on several projects this week:
I spent a lot of this week jumping between projects. As stated in the last post, starting this week I finished the test cuts for the 3D printer case, and it all fits nicely. Problems started to arise when I tried to move on to the final laser cuts in wood. I want the walls to be around 1/4 thick, so the case is sturdy enough to withstand most damages. Very early in the cutting process, I realized that the Shop didn’t have big enough pieces of 1/4 wood for the walls. I went up to Carpentry to see if they had any, and they did, but the wood they had didn’t cut well in Laser Cutter. It didn’t even cut it! I plan on going to Home Depot this weekend to buy the plywood needed as that’s the only time my Father is free to take me.
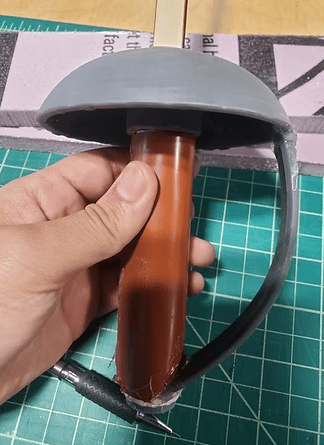
With both my Hunter’s Journal and 3D Printer Case projects on hold, I needed to figure out what I was going to do for the rest of the week. I decided to do a simple project that could be done within the week, a simple prop akin to the axe or staff I made a couple of months back. I wanted to make a rapier as I’ve been wanting to make a sword for a while now. I sketched out the design/plan and did some research on real rapier measurements. I scale down the average size of the measurements concerning my height, so the length of the blade goes from 42 in down to 26 in.
I worked on the model of the rapier for all of Tuesday and (After some issues) resin-printed the domed crossguard plus crossguard handle. I used around 7 in PVC pipe for the handle and wrapped it in this strange plastic leather-looking thing in the Shop Cloest that I used to replicate the look of a leather handle. Laser-cutting a base for the blade out of 1/8 wood due to stability concerns as the blade may get wobbly when gets farther from the handle. I gained some foam for the Drama Club backroom and spent most of Thursday gluing, cutting, and forming the foam into the rough shape of a rapier blade. I plan on spray-painting it a steel color on Friday and if I can finish it by the end of the week. Also, hopefully, finish up the 3D Printer Case.
See more of Echo’s work linked here.
Sophomore Miles Hilliard is working on multiple projects as well:
The first 2 days of shop this week were spent replacing XT30 connectors on the ROV’s power distribution board. There have been connection issues in the past, and I really didn’t want this to factor into existing reliability issues.
On Wednesday, Jonas Wirz and I got the ROV into the pool, however, we had some free time before then and were very productive with it.
Timothy Hunt suggested we insert a temperature and humidity sensor into the ROV for testing purposes. We put it in the tube while Jonas practiced the competition tasks. Due to a faulty seal, some water got into the tube. Our results with the sensor were a bit skewed.
The ROV’s power issue has been solved, and my software based solution seems to be working. A small bit of tweaking will make it more robust. Another issue presented itself as well. The I2C communication for the IMU at times will cut out. Due to a lack of proper handling, the code exits and the ROV shuts down. Some more investigation will help this.
Ultimately, we plan on putting the LiDAR sensors on the autonomous golf-cart project:
See more of Mile’s work linked here.
The Freshmen are moving through our guides at lightspeed. Last week they continued their understanding of coding and circuitry. It’s so fun to watch them learn!
That’s all for this week!

You must be logged in to post a comment.